
The other night while making dinner for a friend, I decided to serve a bottle of
1995 Il Palazzone Riserva Brunello di Montalcino, a coveted Five Star Vintage that I have been eyeing in my collection for quite some time. Since I was busy cooking I gave my friend the task of pouring the wine. Just as I was taking the rack of lamb out of the oven, I looked over and saw my friend about to pour the wine straight from the bottle to our glasses. I quickly interjected and suggested we decant it. With a puzzled look on my friends face, he asked why? I responded (with a slightly unsure answer), letting him know that I typically decant older vintage wines as it helps to remove any sediment and to coax in the development of the flavor profile.
Brunello di Montalcino is one of the most famous and prized red wines produced anywhere in the world. It is made entirely from the Sangiovese grape and it is one of the longest-lived red wines of Italy, with most bottlings drinking well for 12-30 years. According to Alder Yarrow, of the blog
Vinography, he suggests to decant Sangiovese as far in advance as possible. As Sangiovese, more so than any other grape, seems to require a lot of oxygen contact to open up. The younger the wine, the more he says to decant it, but even when serving a 20 year old Sangiovese, he suggests should remain in the decanter for at least an hour prior to drinking.
Since it seems there is some controversy about the notion of to decant or not to decant a wine, I decided to do a bit of research and get down to the bottom of it! Many experts say yes to decanting as it helps to soften the wines tannins, where others say it may ruin a wine by overexposing it to oxygen.
Decanting can be defined as pouring a liquid from one vessel to another to separate it from its sediments and to allow it to breathe, to improve its taste. In my research I found that many wines on the shelves today have no real need for decanting. The modern winemaking process ensures the wine is thoroughly clarified before it is bottled, by a process of fining (passing egg whites or bentonite clay through to collect solid matter) and mechanical filtration.
But wines which have aged in bottle (10 years of more), typically red wines rather than white, may acquire sediment. This sediment can be displeasing to the eye, and can also be unpleasant in the mouth, which is why they would deserve decanting.

Some young wines such as bold reds (Cabernet Sauvignon, Barolo, Bordeaux) and even some whites (Mersault , Chardonnay) can also benefit from decanting, although not for the removal of sediment (as there is rarely any such sediment in young wines), but rather to aerate the wine. The action of decanting softens the youthful bite and encourages the development of the more complex aromas that would normally develop when aged in bottle. But, be careful what you choose to decant, author
Karen MacNeil, The Wine Bible, notes that it could be harmful for more delicate wines like Chianti and Pinot Noir.
The effectiveness of decanting is still a hot topic with some wine experts like Emile Peynaud claiming that the prolonged exposure to oxygen when decanting actually diffuses and dissipates more aroma compounds than it stimulates. And that the process of decanting over a period of a few hours does not have an effect of softening tannins. The softening of tannins occur during the winemaking process and oak aging when tannins go through a process of polymerization- decanting merely alters the perception of sulfites and other chemical compounds in the wine through oxidation, which can give some drinkers the sense of softer tannins in the wine.
So how do you know if a wine should be decanted? When in doubt, it is always good to verify if a wine needs to be decanted before unloading an entire bottle into a vessel. I suggest, start by pouring a small sip from the bottle to taste, then swirl it around in the glass to incorporate air and let it breathe for a minute or so, next take another sip, if the wine seemed to benefit and opened up after the second sip, then you may want to decant it. This can be slightly different for an older wine, I typically take a candle or flashlight up to the bottle to gage the amount of sediment before choosing to decant, but also tasting the wine works here too.
The How-To of Decanting:Older Wines:
Since the decanting process in older wines is mainly for removing the sediment, it is best to stand the bottle in which you will decant upright the day before (or at least for several hours) to allow the sediment to settle. When opening, take the cork out and slowly pour the wine at a 60 degree angle into the decanter. Stop pouring when you see sediment start to pour with the wine. Set the wine down and repeat again after 5 minutes. You may have to do this a few times to get all the wine out of the bottle. But since older wines are a bit more fragile, as it could possibly ruin a wine by overexposing it to oxygen, they should be decanted and served immediately.
Younger Wines:
Since the decanting process is to aerate younger wines, simply open the bottle and pour completely upside down into the decanter, this “beats up” the wine a little, giving it more air as you pour, which can speed the aerating process along. Once it is in the decanter, give it a few swirls and let it sit for a bit before serving. Another way to “decant” a younger wine is through an aerator pourer. In recent years several companies have designed these portable pourers, which attach to the opening of the bottle, allows the proper amount of air to be drawn into the wine, letting it breathe instantly. This is a great tool, if you only want a glass or two, as it allows you to pour as much as you want rather than decant an entire bottle.
Cleaning a Decanter:
Some decanters (such as the
Eve by Ridel) may be a bit tricky to clean in a standard kitchen sink, so Maximillan Ridel suggest utilizing your bathtub or shower when rinsing one out. It is best to rinse it with mineral water to remove any residual chlorine odor. Never clean your decanter with detergent, because the shape of a decanter makes it very difficult to get the soapy residue out. When storing a cleaned decanter, same as nice stemware, be sure that it is spotless and free from any musty cupboard aromas.
Types of Glass Decanters:Decanters come in all shapes and sizes, as well as price points. One is not particularly better than the other, but rather a personal preference. Some people like having a simple, clean designed decanter where others, like having a “show-piece” at their dinner table.
Riedel Decanter (from Williams-Sonoma $49)  Riedel Amadeo Lyra Decanter ($395)
Decanter Helpers:
 Cascadia Aerating Wine Funnel with Stand ($18.99)-
 Directs wine towards sides of decanter or glass while you pour enhances the bouquet & softens young wine, bringing out flavors that would take hours by simply decanting.
Types of Aerator Pourers:Much like a decanter, these aerators come in different shapes and sizes, as well as price points. I have the Wine Soiree pourer, and like it, but have also had wine poured from the different aerators, which I think work nice as well. So again, it is up to personal preference!
Wine Soiree Decanter Aerator Pourer ($19.99) 
Vinturi Essential Wine Aerator ($39.99) 
Versovino Wine Decanting System ($40)


 Tony and his bartender friends mixed up a variety of mouth-watering drink recipes from his book. My favorite was the Bardstown Sling:
 After trying a few of his signature cocktails, I said my goodbyes and thank you’s and hi-tailed it over to the tented beachfront of the Ritz Carlton where my next stop was awaiting me: The Amstel Light Burger Bash presented by Allen Brothers Meats and hosted by Rachael Ray.
 The Burger Bash is not your typical beach BBQ; it is a super-size burger extravaganza for 2,800 people, with 27 different burgers prepared by a culinary team of 120 in a 25,000 sq/ft tent. Just to give you a scope on the size of this event, here is an inside look of the ingredient list: over 7,500 lbs. of 10 different varieties of ground meat to make up 48,600 burger portions, 400 lbs. of smoked bacon, 500 lbs. of coleslaw, 1.5 tons of Idaho Potatoes, 125 gallons of Heinz ketchup and mustard. And what better way to wash it all down, than with 7,000 servings of Amstel Light Beer!
  It was nice to see some of the great chefs put their personal spin on the classic burger, for instance Iron Chef, Masaharu Morimoto made the Pork “Kakuni” Burger, a seasoned beef burger topped with glazed pork belly and Marcus Samuelsson of Aquavit made the Crunchy BBQ Kobe Burger with Kobe beef, chunky BBQ sauce served with an interesting arrangement of pickles.
  With so many amazing burgers it was hard to choose a favorite, but if I did it would be a toss-up between, Michael Schwartz’s, of Michael’s Genuine Food & Drink in Miami, Bacon Cheeseburger with house smoked bacon, white cheddar, heirloom tomato, lettuce on a Brioche Bun served with a side of crispy spiced hominy


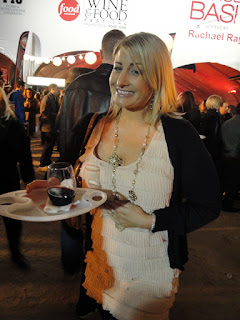

 The event was incredible and the décor was genius. As I enjoyed a Maker’s Mark cocktail, and rubbed elbows with Guy Fieri, Michael Chirarello and other Food Network personalities, I found myself in a conversation with Bruce Seidel, the senior vice president of programming for the “Cooking Channel”. This is the new sister channel of the Food Network which will feature more chefs and food content launching in May. Mr. Seidel said, “The new channel won’t have any competition based shows, those will all remain on the Food Network, but it will incorporate new content such as shows based on wine and cocktails.” Fabulous I thought, it was about time to have some shows about beverages!
 Just as I was about to throw in the towel and get to bed, I ran into my good friend Chef Roberto Trevino from Puerto Rico, a featured contestant on this season’s Next Iron Chef. He convinced me to make one last stop of the evening, the Patron’s Great Debate Party hosted by Chef Aaron Sanchez, at the W Hotel. I thought, what the heck, “when in Rome”, so we ventured over to the party and indulged in a few margaritas and danced the night away.
 The sun was shining, the sand was warm under my toes and the water was crystal blue. It was a picture perfect day in South Beach!
 Once we arrived at the Grand Tasting Village, we eagerly started imbibing and nibbling. Highlights included, the Hornitos sand castle, the Cruzan Rum steel drum band, tasty pestos from Maison Le Grand, and some cool Aperol branded sunglasses! It was a fun afternoon to say the least.

 Later that night I attended the Best of the Best at the Fontainebleau Hotel, presented by Wine Spectator. This was an extraordinary French inspired event, with dishes prepared by over 35 renowned chefs and wine served from top wineries from around the world.
  Standouts included: Chef Douglas Keane from Cyrus in Healdsburg, Chef Michael White from Marea in NYC, Chef Cesare Casella from Salumeria Rosi in NYC, Chef Stephan Pyles from Dallas, and dessert by Mindy Segal from Mindy’s Hot Chocolate in Chicago. I also enjoyed some lovely wines from Vine Cliff, Ladera, Bodegas Caro, Hanzell, Jordan and Ruinart Champagne.


 The lesson began with some interesting historical facts about pizza:


 Our class moved over to a table where we were served a Grangnano wine, Penisola Sorrentina “Lettere”, think Lambrusco style, to go with our custom pies. As each of us enjoyed the first slice of our own creation, we then switched plates to try each others for the second slice. It was interesting to see the difference in the taste/structure of the pizza; they were all a bit different even though the ingredients were the same. I think I got a little over-zealous with my dough, it was slightly chewier then a few of my classmates…I guess I have some practice to do! Roberto also brought out several signature pies for us to sample as well, one of my favorites included a butternut squash (for the base), chestnut cheese, mozzarella and basil- yum! He also introduced us to a dessert pizza with nutella, it was delicious.
